Thursday 27 February 2014

Potty Training made Fun

Warning: Some of the author's recollection might make you cringe

Yes, as the title suggests this entry will be about potty training. I know for some this wouldn't be blog-worthy but I've thought of writing it anyway because I also have some Pinay friends asking me for tips about the subject.

Now, I am not claiming to be an expert on this matter as I could barely remember how we toilet-trained our eldest, who is now 9 years old. Didn't we just asked him nicely to sit on the toilet one day and then in one fell swoop was nappy free ever after? Now, that sounded like an excerpt from a book of potty training fairy tale didn't it?

Well, let me tell you a real potty training story I know:

The Past

There might have been wee targets, soft toilet cushions for babies and child-size portable potties available in the Philippines then but I don't recall using any of those products. Probably because growing up, I didn't see my mum use any of those items for my siblings. So then, without any aid from a step stool or toddler potty, we had to lift J up to the toilet and hold him so he doesn't slip down into it.

I was a first time mum then and the closest to a portable potty I could remember was the arinola, as shown below:


The dependable arinola
English translation: Chamber pot, urinal
Photo source: http://gelat.files.wordpress.com/2010/07/dsc_0119.jpg
I could only recall a few techniques we've tried to ease Jian into using the toilet. Below worked for him:
  • After J turned two, we started talking to him about the use of that "white porcelain thing" in the bathroom. 
  • Steve and I would act out sitting on the throne; waiting patiently while making the sounds...psssssss...psssssss for wee and uhhh...uhhhhhuh for poo. 
J was ready and soon enough, he has mastered doing number one by the age of two and a half.

The second stage of potty training got more interesting for us. Now, I am not exaggerating but I could remember vividly how Jian-so repulsed by the smell of his own poo, would gag up every time he does number two. We managed to solve this issue by giving him a bar of soap to smell while he was on the throne. He did get over this stage and by the age of three, it was permanently goodbye diapers for J.

That story happened more than five years ago.

The Present

Now, for the second time we are part of another toddler's journey towards toileting independence. Our sweet little girl is nearly two and a half and has ticked all the boxes for potty training readiness.

Before she turned two, we bought her a toilet step trainer for our upstairs bathroom to get her familiar with using the toilet. We started asking her to sit on the potty and helped her with her clothing. She excitedly participated in this routine and we even tried going nappy free for one to two hours a day. There were many accidents cleaned and ignored and lots of praises for little things accomplished.

Hannah's upstairs potty set up
Say wee!

To refresh my memory about potty training, I borrowed this book from a local library;

Author: Elizabeth Pantley
It's a very helpful read full of simple and effective potty training ideas

and looked for some picture books related to this subject matter for Hannah. I found this one:


Hannah also adore cats at the moment. She tries to run after our neighbour's cat every chance she gets. We would also watch videos of funny cats online and she would giggle like crazy.

This sparked a project in my mind- to make a potty training corner for H in our downstairs bathroom. It wasn't a very original idea but I was enthusiastic because it's a "two birds in one stone" concept:
  •  It would make potty training more interesting for H and would mark the transition from our  pre-potty training routine to a more active toilet training
  •  It would solve my problem of having to go upstairs to get H to her upstairs toilet step trainer

I knew instantly what theme to go for- she's cute, wears pink and she's a CAT!; she's HELLO KITTY!

Shhhh!
I added the bubble to remind me to be patient and serious about this whole journey.


Hello Kitty on the toilet..how cute!
Image source: http://images1.wikia.nocookie.net/__cb20050414221534/uncyclopedia/images/a/a1/Hello_kitty_toilet.jpg

With a little computer magic I  personalised this Hello Kitty inspired
potty/reward chart for H


Potty training essentials within reach:
Wet wipes
Lots of books to keep H busy
Spare undies, shorts, some nappy
Antibacterial wipe/ handgel


Hannah's downstairs  Hello Kitty potty training set up

Hannah was delighted when she saw my little surprise for her. I recalled her exclaiming, "It's HELLO KITTY!!." We spent a while in our downstairs bathroom that day talking about Hello Kitty and her new potty corner. I explained to her our reward policy and later she sat down on her portable potty and grabbed a book to read:

Great! She seems comfortable :)

Rewards

Two days after introducing her to her Hello Kitty corner Hannah made a big progress. It was in the morning and I was busy in the kitchen when I saw her come out of the bathroom without undies. She told us, "I did it mummy...there's a yellow thing on my potty". Jian and I almost ran to the bathroom at the same time to check if she actually has done it. I never thought I would be that happy seeing yellow urine in a potty. We were so proud of her.

Aside from a stamp on her chart, I decided to make breakfast a little special that day and reward her for a big accomplishment

Hannah's Hello Kitty Pancake reward

I'm a cat!
Hannah's reward for doing number two on the potty :)


The following days were marked by a big progress on H's training. She still needs reminding and assistance but she can now go nappy free during daytime and only have to wear a nappy for sleep time.


Cleaning up

Hannah did make breakthrough with her toileting skills but it didn't mean the process was without any accidents.  Here are just a few examples:
  • Her bladder control is still developing so sometimes the wee comes out before she could fully pull her pants down.
  • One time the  bathroom door was shut, so she couldn't get in and went right outside 
  • She still forgets to pull her pants down first before sitting on her potty 
  • She's busy playing or watching her favourite cartoon and I forgot to remind her to go
I found it handy to keep a potty training journal for H's :


    Hannah's potty training diary shows me her toileting patterns
     and progress so I could plan ahead and learn from previous mistake


I have also prepared this cleaning solution especially for H's accidents:

Love the smell of Eucalyptus on my freshly washed laundry too!

This is great for squirting over the soiled area of a carpet or hard floor. It leaves the area smelling fresh with Eucalyptus scent.


Ingredients:
1 cup of water
1 capful of Eucalyptus oil
2 drops of dishwashing detergent

Mix all the ingredients together in a squirt bottle and voila! You have a natural deodoriser and disinfectant cleanser.


Talking from experience
  • Both parents have to be committed to potty training their child/children. It's not just a mum's job.
  • PATIENCE and DEDICATION. Tons of them.
  • Make the routine fun and engaging for both of you. Use pictures, music, movement and other creative expression to your advantage.
  • Ask for advice or do some research before you start your potty training journey with your child/children.
  • Remember to show your 'joy' when encouraging and praising your little one. They can tell when you are genuinely proud of them.
  • Think of fun ways to reward your child's progress.
  • Resist the urge to scold them after an accident. Rise above, clean up and move on.

Below are some related links to potty training that I have read and found helpful:

http://www.sheknows.com/parenting/articles/837059/differences-between-potty-training-and-
poopy-training

http://connectability.ca/2011/03/14/steps-towards-toileting-independence/

The End. 
Wow, this is one long post! Thank you for reading it up to this point.
Now here are some toilet humour for you:

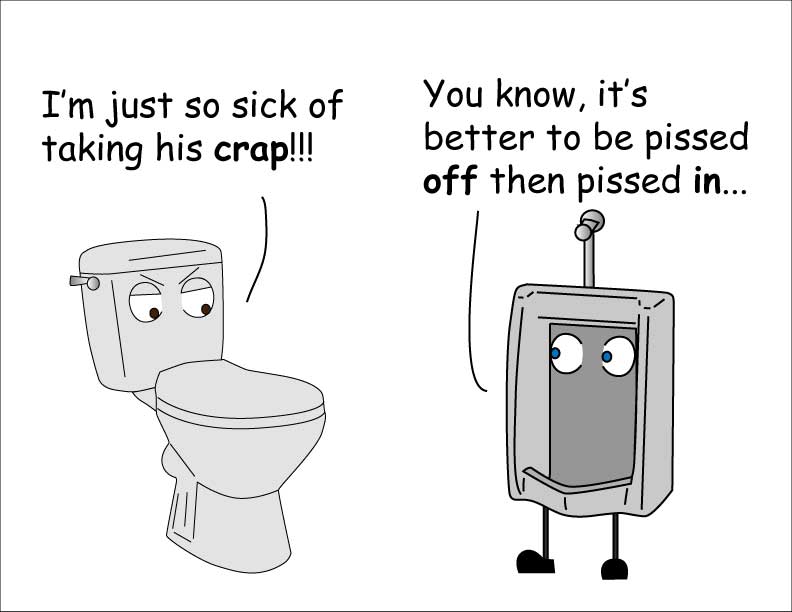
Source: http://fc06.deviantart.net/fs71/f/2010/284/2/f/toilet_humor_by_inhaledone-d30kogo.jpg
Source: http://stevenmarkham.files.wordpress.com/2011/07/bathroom-games1.jpg

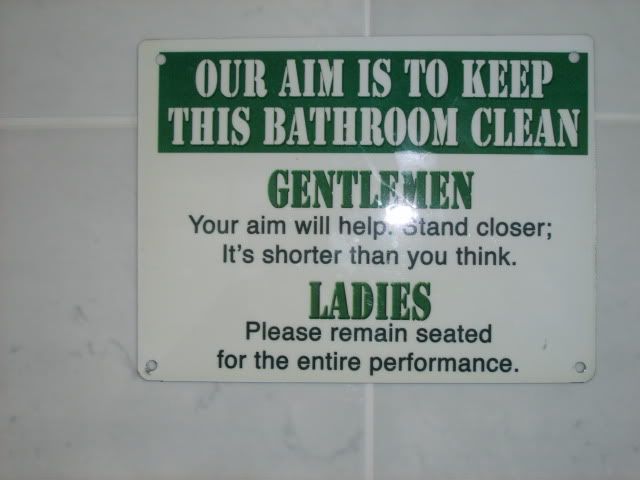
Source: http://i188.photobucket.com/albums/z146/grandad_03/008-13.jpg

Tuesday 25 February 2014

3D Minion Cake for Australia Day

A few days after my son's Minecraft birthday party was another joint birthday party for our kumpadre's (Hannah's godfathers). They are indeed very dear to us so I thought of making them a cake. Still in high spirits due to my first ever 3D Minecraft cake (see my previous post); the enthusiastic and eager me decided to try another 3D cake. I thought it would be a great opportunity to practice and play with fondant again.

I went on a search for 3D cake inspirations online and found so many but I just couldn't get over the cuteness of the  3D Minion cakes! I know it's a party for grown-ups but who could resist a Minion? Below are my favourites:

Image source: http://www.howtocookthat.net/

Image source: http://cakecentral.com/b/top-despicable-me-cakes


So on with the research. I  finally found this very helpful video tutorial on how to make a 3D Minion cake by a very talented mum- Ann Reardon:

http://www.howtocookthat.net/public_html/despicable-me-2-3d-minion-cake-decorating-tutorial/

I watched the tutorial so many times and committed to making a Minion cake. I baked 7x of the chocolate recipe I used for the 3D Minecraft cake the day before the party which  was really a LOT of baking since I only have one round cake tin of favourable size that I can use. I also decided to make a "sitting-down Minion" cake instead of a "standing-up Minion"  due to budget and shortage of resources. I did not use buttercream frosting for this cake as you will see later.

That night I had a "lightbulb moment" to change the colour of the Minion's denim overalls to green as the celebration also coincides with the Australia Day weekend. The idea floated in my head and it got me really excited.

I used two different fondants:
1. The rolled buttercream icing from my previous blogpost for the  Minion's golden yellow skin and its green overalls and;
http://allrecipes.co.uk/recipe/6219/rolled-buttercream-icing.aspx
note: for the above recipe, I found that I have to use 2 kg of icing sugar

2. The home made fondant recipe from this blog site for the eyes, hair, buttons and other accessories:
http://honestcooking.com/making-your-own-fondant/
note: I used half of the recipe

I haven't really tried out other rolled buttercream icing recipes but my son and I really liked this buttercream fondant because it smells like toffee and just melts in your mouth. Though in saying this I also wanted to try the traditional home made fondant and find out how its texture differs from the  buttercream fondant. I have personally learned that the home-made fondant is easy to prepare and cheaper as compared to buying a ready-rolled brand at the supermarket. I also discovered that it gets stiff faster than the buttercream fondant.

I followed the tutorial and made the eyes, goggles, buttons ahead of time and placed them in the fridge so they could harden a little bit.

Hannah "helping" me roll out some green fondant

The next day we also had to cook Pansit Bihon Guisado (a noodle dish), because that's what we have agreed to bring to the party. I used the recipe from the link below as a guide:

http://www.kawalingpinoy.com/2013/03/pancit-bihon-guisado/

Yum! Pansit guisado topped with Chinese sausages and prawns

Note: Though the name of the dish is pansit bihon, I personally prefer using the green bean vermicelli noodles or glass noodles because of its texture.

Unfortunately, in between cooking the pansit and getting ready for the party I ran out of time decorating the cake and my 3D Minion cake became the cake that never made it to the party :-(

My unfinished Minion cake


The celebration was a warm gathering of friends over a table full of scrumptous dishes and desserts. There were already sweets and baked goodies on the table like chocolate cake and Pavlova, so there was really no need for a  3D Minion cake that day.With our growing Pinoy group sharing stories and laughter over food- the party was great as usual.


Kain na tayo! Let's eat!

The next day, I was very lucky that hubby was home and took the children out so I had enough time to finish the cake in peace and quiet- too quiet actually. After almost four hours of epic fail moments while decorating the cake, I felt relieved that the final outcome wasn't as bad as I expected and still turned out to be a recognisable Minion cake in green overalls!

As you can see above, the yellow fondant didn't cling smoothly onto the cake.
I wondered if it would have been any different had I used buttercream frosting.


Tada! 
Now, what to do with this Minion cake smiling and sitting on the table? Ahhh..share it with friends while watching the Australian Open Tennis Championships.  HAPPY AUSTRALIA DAY 2014!


How could I cut something so cute
and defenceless? 


Very well played Wawrinka :)
Photo source: Doris


Would I try making another 3D cake in the future?.......YES!


Tuesday 4 February 2014

Minecraft Birthday Party Challenge

With less than two weeks into his birthday on January, my son and I were having a conversation to finalise his birthday plans. We had previously agreed to a laser skirmish game with his closest friends which I still hadn't book at the time. Honestly after the  Christmas and New Year's celebration, my brain just wanted to go on a temporary shutdown. Enough planning, enough wrapping presents, enough cooking, that is; until he changed my mind : "OR, HOW ABOUT we  have a Minecraft party instead?"

Against  all rationality I said, "YES, I think that would be a great theme..............................................."

So with my creative and ambitious cap on, I embark on a challenge to host and carry out a Minecraft- themed party in under two weeks.

I immediately began research into my son's favourite pixelated game. I was very thrilled to find so many ideas online about Minecraft-related birthday parties. Below are my favourites:

http://www.frugalfamilytimes.com/2013/08/minecraft-birthday-party-printables.html
http://momof6.com/at-home-birthday-parties/great-ideas-minecraft-birthday-party/
http://www.thekitchenmagpie.com/how-to-throw-a-simple-minecraft-birthday-party
http://www.rookno17.com/2013/12/10-ideas-for-ultimate-minecraft.html

I was relieved to learn that there are so many relevant Minecraft ideas out there. Now the real challenge lies on selecting and putting these ideas together to make it personal and within our budget.

Another consideration was the party food, which I really strive to try to be on the healthier side of. After some thinking, I have come up with Jian's  list of party food which I am happy to serve to his guests:
  • Redstone- Strawberries                                 
  • Golden apple- Fresh apricots
  • Watermelon-Watermelon                              
  • Gold- Chicken nuggets
  • Bread-Bread                                                  
  • Coal- Blueberries
  • Carrot- Carrot sticks                                      
  • Cookies- Mini choc-chip cookies                
  •  Potion of Healing- Freshly made lemonade

Extra: Popcorn
The favourite among the party food! Golden chicken nuggets :)

Party food in green platters with Minecraft food cards

Ice-cold lemonade

Sweet blueberries

For the party favours, we have made and included the following:
Loot bags from brown paper with Creeper face stuck on them

The party favour table covered in brown to look like a crafting box,
includes:
sticks-bread sticks
TNT- mini liquorice
chocolate bars with Minecraft label
diamonds- Easter egg white choco with metallic blue wrapper
hand-made bookmarks

 Minecraft bookmarks that we made with laminated A4 board,  printed message and glued-on Minecraft characters/items with green and brown ribbons
How adorable are these mini- TNT's?
 Just stack the mini liquorice 2x2, wrap it in clingy plastic and put a label! cuteness!

The children were also able to take home some fun Minecraft  paper craft like below; from this helpful site:

http://pixelpapercraft.com/tags/official/character

Steve with diamond armour and sword which we also used as a cake topper;
a slime box we used to hide objects in for our scavenger hunt;
sword and pickaxe we used to decorate our house with;
hours of paper craft fun!  :)

For Jian's cake (yes, don't forget the cake as no party would be complete without it, especially this one ^_^); I have to say from experience that this was my biggest challenge. I do bake occasionally but never have I decorated a cake or cupcake with FONDANT!! I really wanted to make a cake that is "Minecrafty" so I had to start from scratch and do some more research on the best moist chocolate cake recipe (Jian's request) and fondant recipe. With only nine days remaining til his party I could feel my stress levels rising!

Luckily,  I have found these recipes on the web which I have tried and tested;

Moist chocolate cake:
http://www.cadburykitchen.com.au/recipes/view/moist-chocolate-cake/
Rolled buttercream fondant:
http://allrecipes.co.uk/recipe/6219/rolled-buttercream-icing.aspx
note: I used 2 kg of icing sugar for this fondant


One happy boy :)
I am one happy mum from getting positive feedbacks about the decoration and the taste of the cake :)

Before I decorated the cake, I had printed out some visuals and put them up on the kitchen wall so I have a guide. It made the task less stressful as I now have an idea of the design I am aiming for. There are so many available online Minecraft cake images that you could print out for personal use to create that Minecraft cake design you want. For an amateur like me, I couldn't be happier with how the cake turned out.

Now, enough with the challenging bit, lets talk about the easier element  of this party- the decorations!

As I am trying to be thrifty in every way I can, the internet has become my greatest source of free party decorations. I have found this very helpful and generous blog where you can download and print their files for FREE, yes for FREE!; including Minecraft party banners, food cards and lots of other freebies. Below is the link:

http://catchmyparty.com/blog/free-minecraft-party-printables-from-printabelle

All set for a Mine-tastic birthday celebration :)
The birthday banner from printabelle-
I have a mum-friend come over to help me with the cutting and other crafty stuff for decorations :)
I used these images to make the bookmarks;
thank you printabelle :)

For the enjoyment and entertainment portion of the party, I had Jian to choose  a playlist of his favourite Minecraft Parody songs. Below are his top picks which we played at his party:

Together- A parody by Bruno Mars
New World- A parody of Coldplay's Paradise
Super Natural Mobs-A parody of Katy Perry's California Girls
Minecraft Man- a Parody of PSY's Gentleman

I had chosen three games for the children. All were played indoors, as the forecast for that day wasn't very promising, and is actually the first birthday he had minus the scorching Australian summer heat.

The first game was a modified hunting game, where the children had to shoot balloons containing food vouchers. Each was given one round of ammunition which equals to 6 chances of hitting a balloon. They could redeem the vouchers for later on, and or trade-in with their peers- Minecraft villager style.


The boys enjoyed aiming and shooting at the balloons. I wanted to draw a creeper face on each balloon but didn't have the time :)

The  next game was a Minecraft-inspired scavenger hunt which I originally thought of. The boys had to look for four slime boxes hidden around the house. These boxes contained two diamond egg chocolates and a bread stick, which represent the materials they needed to craft a diamond sword in Minecraft. They have to solve several riddles to find the location of the boxes and get hold of the next clue. The ultimate prize for this game was a diamond necklace.

I have found this really awesome blog about writing scavenger hunt clues. If you are stumped on how to write clues or riddles for your next scavenger hunt like I was, then click the link below:

http://klwightman.com/2013/01/14/writing-scavenger-hunt-clues/

The boys received a diamond sword necklace each for solving all the clues :)
I have pre ordered these cute tokens on eBay and luckily they arrived two days before Jian's party :)

The final game was called FEED THE CREEPER, where the boys had one-minute each to land as many paper balls into the mouth and eyes of a made-up creeper head. It's a game from another blog that inspired me because the materials were all readily-available at home. Recycling equals more savings for me.
For the creeper head, I recycled a box and glued on pieces of green squares of different shades then drew the outline of the Creeper's features and used a sharp blade to cut around the outline. Scrunched-up paper from old newspapers and magazines were tossed into the eyes and mouth of the creeper head.

What I liked best about the party was not the decoration nor the cake; it's the fact that it was spent with Jian's closest mates from both his previous and current school. All boys knew how to play Minecraft and each has a special bond with Jian.

The party ended really well, with everyone saying they had a great time. It's music to my ears but what's more heartwarming is the embrace and "thank you for an awesome party mum" from my nine year old that night.

Minecraft birthday party challenge triumphed!